
This post contains affiliate links. As an Amazon Associate, I earn from qualifying purchases. This comes at no extra cost to you.
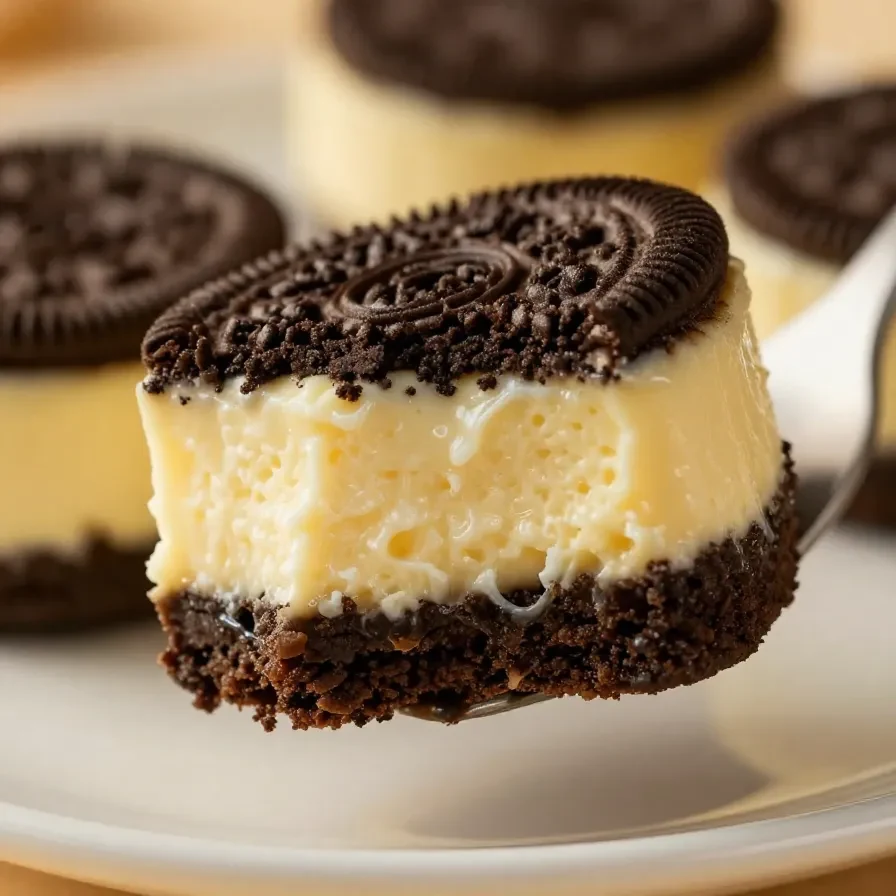
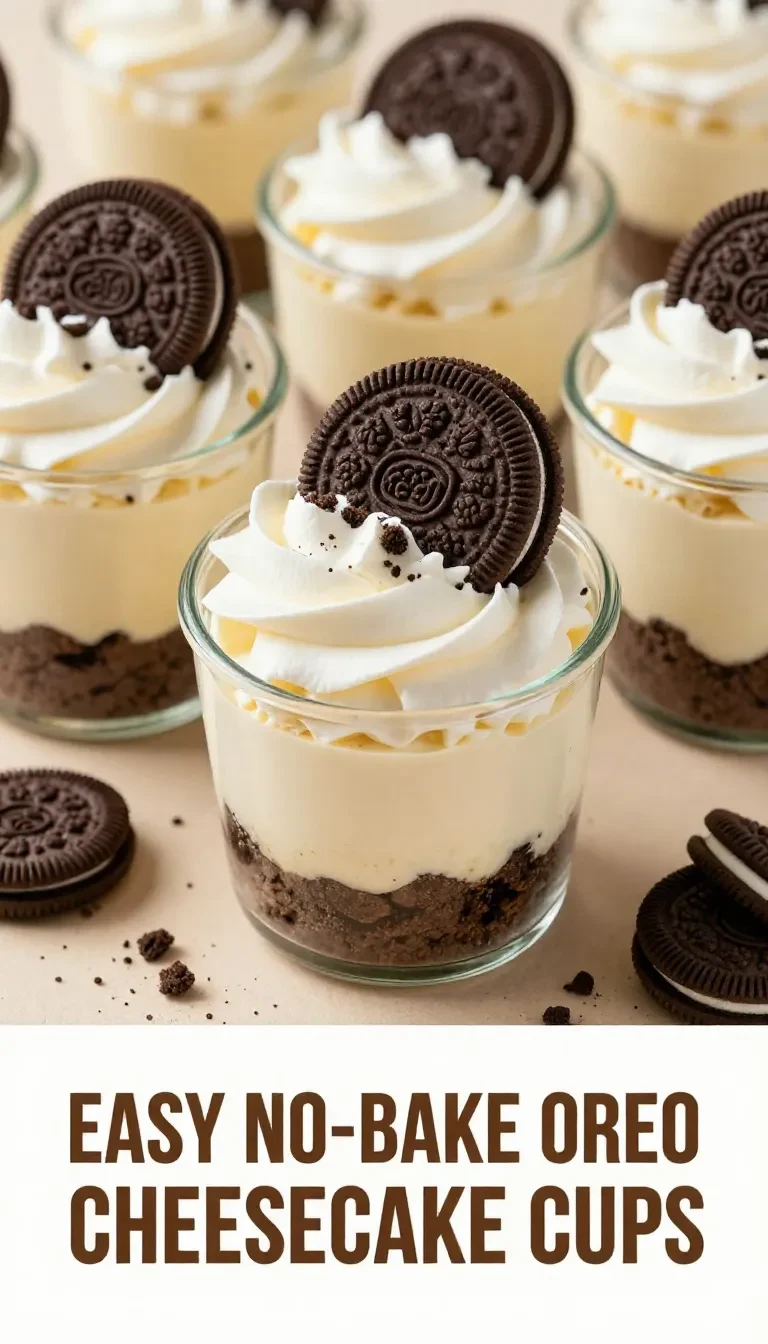
Oreo No-Bake Cheesecake Cups are the perfect fusion of rich, creamy cheesecake and the iconic crunch of Oreo cookies. This easy dessert features a buttery Oreo crust, a velvety cheesecake filling, and a sprinkle of crushed Oreos for added texture. Best of all, it requires no baking, making it ideal for quick cold desserts or last-minute party treats.
Table of Contents
- Why Oreo No-Bake Cheesecake Cups Will Save Your Dessert Night
- Everything You Need for Oreo No-Bake Cheesecake Cups
- How To Make Oreo No-Bake Cheesecake Cups Step by Step
- Common Mistakes to Avoid
- Meal Prep and Storage Tips for Oreo Cheesecake Cups
- Easy Ingredient Swaps for Oreo Cheesecake Cups
Why Oreo No-Bake Cheesecake Cups Will Save Your Dessert Night
- Quick to prepare with minimal effort—perfect for busy schedules. With a total prep time of just 15 minutes, this no-bake dessert is a lifesaver for impromptu celebrations or weeknight cravings.
- No need for baking or complicated techniques. Anyone can assemble these cheesecake cups effortlessly, saving stress and ensuring a smooth dessert-making experience.
- Impressively versatile and crowd-friendly. Oreo cheesecake cups are portioned individually, making them ideal for everything from kids’ birthday parties to elegant anniversary treats.
- Customizable to fit dietary needs. Using halal-certified whipping cream ensures inclusivity for guests with specific requirements without compromising flavor or texture.
Everything You Need for Oreo No-Bake Cheesecake Cups
- 12 Oreo cookies
- 2 tablespoons melted butter
- 8 ounces cream cheese (softened)
- 1/3 cup powdered sugar
- 1 teaspoon vanilla extract
- 1 cup heavy whipping cream (halal-certified)
- 4 additional Oreo cookies (crushed, for topping)
The combination of Oreos and cream cheese creates that signature sweet and tangy cheesecake flavor. Heavy whipping cream adds the luxurious fluffiness that makes the filling feel indulgent yet light.
How To Make Oreo No-Bake Cheesecake Cups Step by Step
- Crush 12 Oreo cookies into fine crumbs using a food processor or place them in a sealed plastic bag and smash with a rolling pin. Aim for an even texture so the crust holds together well.
- In a bowl, mix the crushed Oreos with melted butter until fully combined. Divide this mixture evenly among serving cups and press down firmly to create a compact crust.
- In a large mixing bowl, beat the softened cream cheese until smooth using a hand mixer or stand mixer.
- Add powdered sugar and vanilla extract to the cream cheese. Continue beating until well combined, ensuring no lumps remain.
 Kitchen ApplianceKitchenAid Artisan Stand Mixer 5 Quart
Ideal for beating cream cheese and whipping cream to perfection for this recipe.
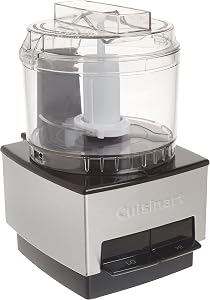
Essential CookwareCuisinart Mini-Prep Plus Food ProcessorCompact and efficient for crushing cookies and prepping small batches of ingredients.
- In a separate bowl, whip heavy whipping cream until stiff peaks form. Fold the whipped cream gently into the cream cheese mixture to preserve the airy texture.
- Spoon or pipe the cheesecake filling onto the Oreo crust in each serving cup. Divide it evenly to create uniform layers.
- Top each cup generously with crushed Oreos for added crunch and presentation flair.
- Refrigerate the cups for at least 2 hours to allow the cheesecake to set. Chill longer if preparing in advance for events.

Common Mistakes to Avoid
- Skipping the whipping cream step. Fully whipped cream is essential for achieving the fluffy consistency of the cheesecake filling, so take the time to whip until stiff peaks form.
- Overmixing the filling. Fold the whipped cream gently into the cream cheese mixture to avoid deflating the airiness, which could result in a dense texture.
- Using warm cream cheese. Ensure it’s softened at room temperature to avoid clumps when mixing with other ingredients.
Meal Prep and Storage Tips for Oreo Cheesecake Cups
If you’re making these Oreo No-Bake Cheesecake Cups ahead of time, store them covered in the refrigerator for up to 3-4 days. Use airtight containers or plastic wrap to preserve freshness.
For longer storage, freeze the assembled cups without the crushed Oreo topping for up to 1 month. Thaw in the refrigerator overnight and add fresh crushed Oreos before serving for optimal texture.
Keep them chilled until ready to eat, especially for outdoor events or summer gatherings, as the cheesecake filling can soften quickly at room temperature.
Easy Ingredient Swaps for Oreo Cheesecake Cups
- Use chocolate graham crackers if you run out of Oreos for the crust. While the flavor will be milder, it still complements the creamy filling well.
- Substitute mascarpone for cream cheese to reduce tanginess and add a richer, buttery texture to the filling.
- Replace powdered sugar with honey or maple syrup for a natural sweetener. This switch slightly alters the sweetness level and adds subtle earthy notes.
Oreo No-Bake Cheesecake Cups
Ingredients
- 12 Oreo cookies
- 2 tbsp melted butter
- 8 oz cream cheese (softened)
- 1/3 cup powdered sugar
- 1 tsp vanilla extract
- 1 cup heavy whipping cream (halal-certified)
- 4 additional Oreo cookies (crushed, for topping)
Instructions
- Crush 12 Oreo cookies into fine crumbs using a food processor or by placing them in a sealed plastic bag and smashing them with a rolling pin.
- In a bowl, mix the crushed Oreos with the melted butter until combined. Divide the mixture evenly among serving cups and press down to form a crust layer.
- In a large mixing bowl, beat the cream cheese until smooth using a hand mixer or stand mixer.
- Add powdered sugar and vanilla extract to the cream cheese and continue to beat until well combined and creamy.
- In a separate bowl, whip the heavy whipping cream until stiff peaks form. Gently fold the whipped cream into the cream cheese mixture until fully incorporated.
- Spoon or pipe the cheesecake filling over the Oreo crust in the serving cups, dividing it evenly.
- Top each cup with crushed Oreo cookies for extra texture and flavor.
- Refrigerate the cups for at least 2 hours before serving to allow the cheesecake to set.
Notes
Loved this recipe? Save it to your favorite Pinterest board so you can easily find it later! ✨